Painting your apartment can be a daunting task, especially if you’re a beginner. However, with the right guidance and tools, you can transform your living space into a beautifully painted haven. This guide will walk you through the process, from gathering supplies to applying the finishing touches. Not only will you learn the technical aspects of painting, but you’ll also discover tips to make the process smoother and more enjoyable. By the end of this guide, you’ll have the confidence and knowledge to paint your apartment like a pro, creating a space that truly reflects your personal style.
Why Paint Your Apartment?
Painting your apartment offers numerous benefits beyond just changing the color of your walls. It allows you to personalize your space and improve its aesthetic appeal, making it feel more like home. A fresh coat of paint can significantly increase the value of your apartment, which is beneficial if you’re renting or planning to sell. Additionally, painting can help cover up imperfections such as stains, scratches, and marks, giving your walls a fresh and clean appearance. It’s also an opportunity to express your creativity and bring your design vision to life. Whether you want a calm and serene bedroom or a vibrant and energetic living room, the right paint color can set the mood and transform your space.

Gathering Your Supplies
Before you start painting, it’s crucial to gather all the necessary supplies. Having the right tools and materials will make the process much easier and ensure a professional finish. Here’s what you’ll need:
- Paint: Choose between latex or oil-based paint depending on your preference. Latex paint is water-based, easy to clean, and dries quickly, while oil-based paint is more durable and provides a smoother finish but takes longer to dry and requires mineral spirits for cleanup.
- Primer: Using a primer helps the paint adhere better to the walls and covers any existing stains or dark colors.
- Paint Brushes and Rollers: Invest in high-quality brushes and rollers for smooth and even application. Different sizes and shapes are useful for various areas and details.
- Painter’s Tape: This is essential for protecting trim, edges, and fixtures from paint.
- Drop Cloths or Plastic Sheets: Protect your floors and furniture from paint splatters and spills.
- Sandpaper: Use sandpaper to smooth out any rough areas on the walls before painting.
- Spackle and Putty Knife: These are used to fill in holes and cracks in the walls.
- Stir Sticks: Ensure the paint is well-mixed before application.
- Paint Tray and Liners: These make it easy to load your roller with paint.
For high-quality paint and supplies, consider checking out Lifetime Painters. They offer a wide range of products to suit your painting needs.
Preparing Your Apartment for Painting
Proper preparation is key to a successful paint job. Taking the time to prep your apartment will save you time and frustration later. Follow these steps to get your apartment ready:
- Clean the Walls: Dust and dirt can prevent the paint from adhering properly. Use a damp cloth or a mild detergent to clean the walls thoroughly. For stubborn stains, a mixture of water and vinegar can be effective.
- Move Furniture: Shift furniture away from the walls or move it to another room if possible. Cover large pieces with drop cloths to protect them from paint splatters.
- Protect Floors and Fixtures: Cover your floors with drop cloths or plastic sheets to catch any paint drips. Use painter’s tape to protect trim, baseboards, light switches, and outlets. Ensure the tape is firmly pressed down to prevent paint from seeping underneath.
Choosing the Right Paint
Selecting the right paint is essential for achieving the desired look and ensuring the paint job lasts. Here are some tips to help you choose the best paint for your apartment:
- Types of Paint: Latex paint is a popular choice for interiors because it is easy to clean, dries quickly, and has a lower odor compared to oil-based paint. Oil-based paint, on the other hand, provides a smoother finish and is more durable, making it ideal for high-traffic areas or surfaces that need frequent cleaning.
- Colors and Finishes: Choose colors that complement your decor and create the desired atmosphere in each room. For example, soft neutrals can make a small room feel larger, while bold colors can add personality to a space. Consider the finish as well: matte and eggshell finishes are great for hiding imperfections, while semi-gloss and gloss finishes are more durable and easier to clean, making them suitable for kitchens and bathrooms.

Prepping the Walls
Proper wall preparation ensures a smooth paint application and a professional-looking finish. Here’s what to do:
- Fill Holes and Cracks: Use spackle to fill any holes, cracks, or dents in the walls. Apply the spackle with a putty knife, smooth it out, and let it dry completely. Once dry, sand the area until it is smooth and flush with the wall surface.
- Sand the Walls: Lightly sand the walls with fine-grit sandpaper to create a smooth surface for the paint to adhere to. This step is especially important if your walls have a glossy finish, as it helps the new paint bond better.
- Prime the Walls: Apply a coat of primer to help the paint stick better and cover any existing stains or dark colors. Primer also creates a uniform surface, ensuring the paint color looks consistent and vibrant. Allow the primer to dry according to the manufacturer’s instructions before applying the paint.
Painting Techniques for Beginners
To achieve a professional finish, follow these painting techniques:
- Cutting In: Use a brush to paint the edges and corners of the walls first. This technique, known as “cutting in,” helps create a clean line between the walls and the trim or ceiling. Take your time and use painter’s tape to help guide your brush strokes.
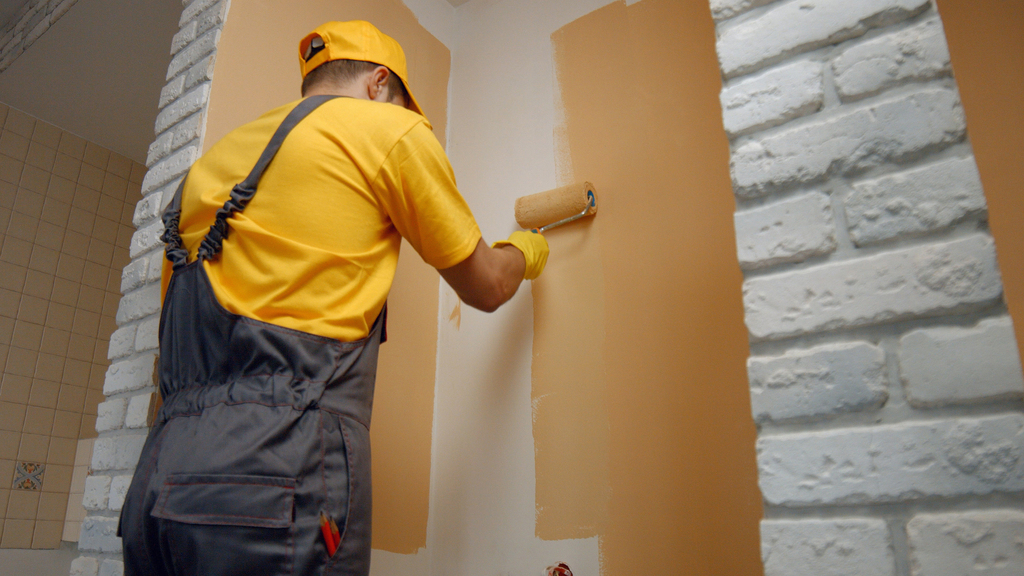
- Rolling: Use a roller to apply paint to the larger areas of the walls. Start from the top and work your way down, applying even pressure to avoid streaks. Roll in a “W” or “M” pattern to ensure even coverage and to blend the paint seamlessly.
- Multiple Coats: Apply at least two coats of paint for even coverage. Allow the first coat to dry completely before applying the second. This ensures that the color is rich and consistent, and helps cover any missed spots or uneven areas.
Tips for a Professional Finish
Achieving a professional finish involves attention to detail and following best practices. Here are some tips:
- Avoid Drips and Streaks: Wipe excess paint from your brush or roller to prevent drips. Apply the paint in thin, even layers, and use long, smooth strokes to avoid streaks. If you notice any drips or runs, smooth them out immediately with your brush or roller.
- Blend Edges: Overlap the edges of your strokes to blend the paint seamlessly. This is especially important when working with multiple coats or different sections of the wall.
- Check for Missed Spots: Inspect the walls in different lighting conditions to ensure you haven’t missed any areas. Touch up any missed spots with a brush or roller, and blend the edges to create a smooth, even finish.

Clean-Up and Maintenance
After painting, proper clean-up and maintenance will keep your apartment looking fresh:
- Clean Brushes and Rollers: Wash them with warm soapy water (for latex paint) or mineral spirits (for oil-based paint) immediately after use. This helps maintain the quality of your tools and ensures they are ready for future projects.
- Store Leftover Paint: Seal paint cans tightly and store them in a cool, dry place. Label the cans with the room and date, so you can easily find the right color for touch-ups later.
- Maintain Painted Walls: Clean walls with a soft cloth and mild detergent as needed to keep them looking new. Avoid using harsh chemicals or abrasive cleaners that can damage the paint.
Conclusion
Painting your apartment doesn’t have to be a challenging task. With this beginner’s guide, you’re equipped with the knowledge and confidence to tackle your painting project. Remember, the key to a professional finish is proper preparation, quality supplies, and attention to detail. For additional resources and top-quality paint products, visit Lifetime Painters. Happy painting!

